Archive for the ‘Bread’ Category.

Baking in Your Kitchen in Oakland or Berkeley?

I’d like to teach a class with the Institute of Urban Homesteading. To do to the class, I need a space in or around Oakland that can handle a bunch of people playing with bread dough. Can I use your kitchen? If you have a large oven and some space in or near the kitchen, I’d gladly pay you and/or have you attend the class. Call me!

Here is the tentative class description:
Bread in the Oven
3 hour weekday evening class
Cost $30-50 plus $5 supply fee to be paid on day of class

The focus in this class is making an excellent French bread with just a few minutes of effort. Making bread is easy. It doesn’t have to take a long time or be a lot of work. You can make fantastic bread every day or every week for well under a dollar a loaf with less than 10 minutes of effort including cleanup! We will talk about instant yeast and sourdough, refrigerated dough, crust, crumb shaping, ammendments, the chemistry and biology of bread, and the thousands of varieties of this staple food. Once you have the foundations, you’ll see bread recipes as suggestions instead of steps to be followed. The sky is the limit! We will eat and bring home what we make in class.

Look What I Made Today

Caps
caps

Bread
bread
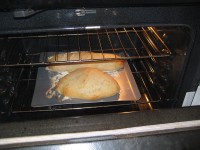
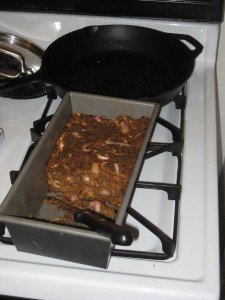
Meatloaf (doesn’t look like much but it’s awesome!)

meatloaf

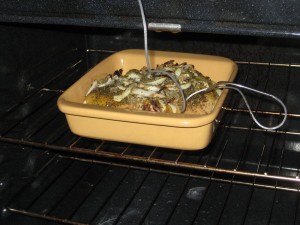
Chicken
chicken

BaconFest!

Macaroni and cheese lubricated with bacon fat – curiously fabulous

Bacon wrapped figs with goat cheese – sublime joy

Cupcakes with bacon icing – yes, cupcakes with bacon!

Bacon wrapped  jalapeño poppers  – Powie! Zowie!

Mini bacon bread buns – one of my contributions!bacon bread

Italian spiced bacon bread rollup – mine! got a couple good reviews :-)

Jesse’s Bacon Wheel Casserole – as he described it, “…just a tuna noodle casserole BUT we use wagon-wheel shaped pasta, AND use bacon instead of tuna. The idea is that the small pieces of bacon will get lodged between the spokes of the wheel.” !! :-)

There were more bacon based finger foods that I consumed that added to the joy of the evening but, alas I forget what they were! Phoey!

Excellent conversation with Susie!

It was startling how within 15 minutes of arrival there was this bacon fueled frenzy of eating and “om om nom nom om!” and heated conversation with eye-rolling-back goodness. It’s weird that it’s hard to put my finger exactly on why it was so good. It was little like being drunk. It was… dare I say, the magic of bacon!

CTP had left a pile of awesome bacon themed buttons. CTP is awesome.

“Bacon: The Gateway Meat”

“Bacon: It’s what’s for dinner”

“Bacon: It’s what’s for desert”

“1: Kittens
2: ???
3: Bacon
4: Genitals
5: Safety”

(If you don’t get that numbered list, historically, safety was first but it had recently fallen to third. But bacon is the new safety and.. well, it’s funny, just trust me!)

Cooking

This is a page that I had on my website at http://lee.org/cooking/index.html for many years. I post it here for archival purposes. I have much more to say about food on my blog. And I can see that how I cook bread has changed. You can see part of that here.

Continue reading ‘Cooking’ »

Impromptu dinner party

Last night we had a terrific impromptu dinner party. Corey called in the afternoon sati g he was in San Francisco with nothing going on. He brought his new girlfriend Melissa. Rick Taylor brought a chicken caserole, our neighbor Cindy brought greens from working at the farmers market. And Charlotte brought her signature pink fizzy Slow Gin Fizz.

We had an appetizer of home made lonza with fresh home made bread.

The dinner table had fresh organic greens, home made garlic bread, home made curry chicken casserole, home made lasagna with “happy cow” Marin Sun Farms ground beef, excellent “super decanted” wine, and candles. All in our tiny apartment in the city!

Oh and desert had the most terrific Earthquake Cake from San Francisco Chocolate Factory with real whipped cream, a tangelo slice and salt sprinkles! Woot!

Merriment was had by all!
I was so full I could barely move :-)

How to Make Bread

Ok, forget what you know about making bread. Just forget it. Now read and do.

Reading this will take longer than it actually takes to make bread.

You’ll probably want to start with a single batch… just cut the recipe below in half to make 2 loaves… or quarter it for one loaf. The more bread you make in a sitting, the less cleanup there is. And refrigerated dough is easier to work with and tastes better because it ferments. But hey.

My four loaf recipe:

  • 12 cups flour
  • 6 cups water
  • 4 tsp salt
  • 4 tsp yeast

The types of flour, salt and yeast matter very little, young Skywalker. Really. Yes, really. Different ingredients make subtle differences but you’ll be so happy with how fricking easy it was to make this loaf, you can worry about that later. Try starting with All Purpose flour, Mortons salt and Instant Dry Yeast in a 1 lb bag.

Directions:

  1. Put it all in a big bowl and mix together with your hand for 60 seconds
  2. Let it rise for 45 minutes
  3. Make into loaves
  4. Bake
  5. Eat!

Really. Just mix together until it’s all wet. I use 1 hand in a big bowl because dough is terribly sticky. If you use a utensil, it’ll get stuck and gooped up (and you’ll have to wash it). If you use 2 hands, then both your hands will be covered with sticky goo!

Don’t knead it or roll it or anything. I’ve tried a couple ways of mixing the ingredients so they mix evenly. I mixed the water in with the yeast. Or poured the salt into the measuring cup or… or… forget all that! Here it is with a bit more detail, what I do and it comes out fantastic every time:

  1. Measure flour and pour into a big bowl (precision is not needed… I’ll scoop 1 1/2 cups one time and then 2 1/2 cups the next… it all pretty much averages out when you’re putting 12 cups into a bowl)
  2. Measure salt and toss onto the pile of flour
  3. Measure yeast and toss onto the pile of flour
  4. Measure water and pour onto the pile of flour. I usually reserve a little water just in case things are getting too wet… and then I almost always end up throwing it in after a few seconds of mixing.
  5. With one hand, stir and grab at the mix until it is an even, sticky gooey mess. Yes, the dough is probably much wetter and stickier than you were envisioning. Don’t remove it from the bowl, it’s too sticky!
  6. Cover it and let it rise for 45 minutes. If it grows to 1.5 it’s original size, you’re good to go.

You now have 4 loaves worth of bread dough. Put some portion (3/4?) of the mix into a plastic container and throw in the fridge for bread later in the week.

With the rest, make bread!
I put flour on my hands and the baking sheet to keep the dough from sticking.

  1. Grab a big hunk of dough and cloak it in your hands (see below) until it looks pretty.
  2. As the last cloaking move, make sure the bottom of the dough has flour on it so it doesn’t stick
  3. Set it on the cookie sheet and let it sit for 5-60 minutes.
  4. Put it in the cold oven
  5. Turn the oven to 425 and set the timer for 50 minutes
  6. When the timer beeps, remove from the oven, let cool and eat!

Here’s what I did this morning with the dough I had put in the fridge… Total work involved: 5 minutes. Total time from fridge to bread: 105 minutes

  1. Set out a cookie sheet
  2. Take the previously mixed dough out of the fridge
  3. Sprinkle the cookie sheet, the dough and my hands with flour (like 1/4 cup of flour)
  4. Grab 1/2 of the dough, pick it up quickly and set it down in the dough gently (if you toss it too roughly, the flour flies everywhere)
  5. Roll the dough in the flour until it isn’t all sticky, maybe 3 rotations.
  6. Cloak the dough, rolling in the dough in flour a couple times when it gets too sticky to handle (cloak: kneeding very briefly by holding the ball in both hands, pushing the middle up with fingers and the sides down with palms, rolling the lumpy bits to the bottom and putting a  “cloak” of smooth pretty dough on the top of the loaf)
  7. Stretch the dough to the desired shapes… I made 1 long loaf and 1 round loaf this morning
  8. Put the cookie sheet and dough in the oven
  9. Let it sit just like that on the cookie sheet for 60 minutes so the dough rises (else the loaf will be pretty dense… maybe you want that though!)
  10. Turn the oven to 425 degrees and set the timer to 50 minutes.
  11. When the timer beeps, take your amazing fresh bread out of the oven and enjoy!

Cleanup for the first batch can take a few minutes. Sticky dough is a mess to clean up. The dough from the second batch, from the fridge is easier to handle. Cold dough isn’t nearly as blob-like.

I’ve been developing a feel for this for a while but I have to thank Charlotte’s gift to me of Artisan Bread in Five Minutes a Day: The Discovery That Revolutionizes Home Baking. It validates what I’ve been doing and gave me some excellent tips.

Sometimes I play with the temperature. I think it makes the crust thicker and heartier. But I could be wrong. Instead of 425 for 50 minutes from a cold oven, I do this:

  1. Put dough in oven and let sit for a while.
  2. Set timer for 18 minutes and oven to 550. (my oven gets to 550 in about 16 minutes).
  3. When the timer beeps, set the oven to 400 degrees and the timer to 22 minutes.

I’ve tried using steam and boiling water and spray bottles to get a better crust and I can’t tell the difference between a steamed loaf and a not-steamed loaf. So I don’t do it any more.

How much yeast to use: I have a recipe book that says stuff like “add 2 1/8 teaspoons yeast unless it’s Blahblah brand and then add 1 7/8 teaspoon”. Forget that. Yeast is flexible. It grows. It’s a bug that grows in your food and it farts a lot. The longer it’s in your dough, the more farting it’ll do, making your bread nice and fluffy. I haven’t ever gone wrong with 2 teaspoons or so of yeast for a batch. When I let it set for a while, I can use less yeast (hence, I use 3 tsp and not 4 in the recipe above) because it’s busy growing in my fridge. I should experiment more with varying yeast levels. Suffice to say that I can’t recall ever having too little yeast, though once when I added too much, the bread tasted a little funny.

Which bread flour to use: It doesn’t much matter. Really. Most recently I’ve been using Giusto’s Artisian Bread Flour in a 50 pound bag because… well, Restaurant Depot sells a 50 lb bag of the stuff for $18. I figured something that sounds like “Artisian Bread Flour” might be better than “All Purpose” for bread but… I haven’t noticed much differences between different flours. Recently I made some nice loaves out of whole grain and white spelt, they came out great. I’ve used mixes of cake flour and all purpose flour, they came out great. I’ve used mixes of whole wheat flour and all purpose flour, they came out great. I noticed that partial-whole-wheat bread has less crust and tastes different. I sometimes add wheat gluten but unless I add a lot, like 3 heaping tablespoons per cut, it doesn’t do anything. When I use that much, the finished bread is stiffer but I’ve gotten little tummy aches from such high concentrations.

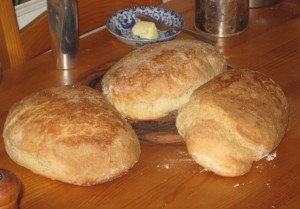
My New Favorite Bread Recipe

Bread is very simple.

Here is my new favorite bread recipe. I started with the Best Recipe recipe for “Rustic Bread” and simplified it because I’m lazy. It comes out terrific.

It takes less than 5 minutes work. Yes, really.

  1. Put 6 cups all purpose flour, 2 tsp salt, 3 tsp yeast  in big bowl
  2. Mix
  3. Add 2 3/4 c water or so. 2.5 – 3.0 cups is fine
  4. Mix with one hand until it’s gloopy, about 2 minutes. No, don’t kneed it
  5. Cover the bowl with aluminum foil for 2 hrs in a warm place
  6. Flour a baking sheet
  7. Grab 1/2 the dough and plop it on the pan
  8. Roll it around a tiny bit so it looks more like a loaf
  9. Grab the other half of the dough and do the same
  10. Turn on the oven to 450
  11. When the oven comes up to temperature (10-20 minutes) put the pre-bread in
  12. Take out the finished bread 45 minutes later
  13. Eat it!

Here is “Bread Making Level 2”. If you want a really nice thick crust do this:

  1. Put a heavy, oven safe pan in the oven below the bread.  (cast iron is good)  
  2. Just before you put the pre-bread into the oven, pour some boiling water in the pan

The steam will give the bread a thick “meaty” crust.

See my notes about the price of yeast

That recipe comes from Cook’s Illustrated’s “Best Recipe” cookbook. It’s a rustic country bread recipe. I find it interesting that, first, one can distill their full-page recipe down to this, and second, this excellent recipe is so gosh darn simple.

Here are some comments on the recipe:

Yes, I just mix it until it’s goopy, like 3 minutes of stirring with one hand in a bowl. The dough will be very wet and it sticks to everything. There’s no point in getting any utensils all gooped up. And I didn’t “work” the dough at all.

There’s all kinds of yeast treatments, like letting it develop for days on end, sourdough starter and the like. I guess they do a little something but feh, just add yeast. And I’ve seen all kinds of yeast: instant, nearly instant, super instant, wet, slimy, goopy. I’ve never tasted or witnessed much of a difference. I used Fleishmann’s #2139 Instant Dry Yeast in a 1 lb vacuum sealed bag.

Doing Right Now

Sitting in the kitchen while VNCing into the bedroom on the snazzy-fast new UltraVNC 1.5.3. The smell of very successful home-made bread (NOT bread machine, the real deal) wafting over my shoulder… and [nom nom nom] the taste proves it :-)  Listening to SomaFM “Space Station Soma” station on my (very pretty!) new iPhone (thanks Mom & Dad!). Finally finding a good display to use for my T. Pen invention. Tapping away on my super-great-deal laptop.  

This afternoon Charlotte and I celebrated Christmas… I found the perfect tree last night on my way home from the FLG “What Are We Gonna Propose to Burning Man?” meeting. We decorated it with candy canes, little disco balls my family got me for xmas, and “ordaments” my niece made for me. We had wrapped and put presents under it yesterday. Today we exchanged gifts to both our delight.

Things feel pretty good at this moment.

My Sister Made Terrific Banana Bread

Last month Melissa sent me a banana bread. I have to say that it was completely terrific. She wrote,

i made three, gave one to a friend and kept one. the one i kept was super cinnamon and was so good, it was a borderline cinnamon bread.

yeah that recipe is a total keeper…the secret are the folgers fresh crystals!

There you have it!

The Price of Yeast

Baking yeast packets at the supermarket: $3 for 3 0.25 oz packets. $64/lb

Bulk baking yeast: $2.29 for a 1lb brick. $2.29/lb

Packets cost 28 times as much. Yipe.

Smart and Final sells packets right next to bulk 1 lb containers. The packets cost $3 for 0.75 oz, the bulk costs $4 for 16 ounces. You do the math. Buy the bulk yeast. It freezes perfectly well after being opened for at least a year (I haven’t ever had to freeze it longer, I use it)

Costco, Sams Club and similar stores also have the 1lb brick of yeast. If you make more than 3 loaves of bread this year, it’s worth getting the large size. With my breadmaker, I make about 30 loaves/year.

Rainbow also has open bulk yeast.  Yeast generally lasts at least 1 year in the freezer… except for the yeast I got at Rainbow. I’m pretty sure it needs to be refrigerated and not frozen because twice now I got yeast there, made a loaf, froze the rest and the yeast was dead after. :-(